| bluepoof.com
email me
installing hawk gt clip-ons
Time needed: Give yourself a full day. It took me two, but hopefully I've arranged the steps in a logical fashion below so as to minimize the time spent redoing them.
- 10mm socket
- 12mm socket
- 30mm socket
- 6mm hex (allen) wrench
- Philips screwdriver
- Sharp hobby or Xacto knife
- Power drill with varying sized drill bits (mostly on the small side)
- Dremel with a bit capable of cutting sheet metal and aluminum
- Square of not-easily-bendable sheet metal; about 3" sq. will be enough
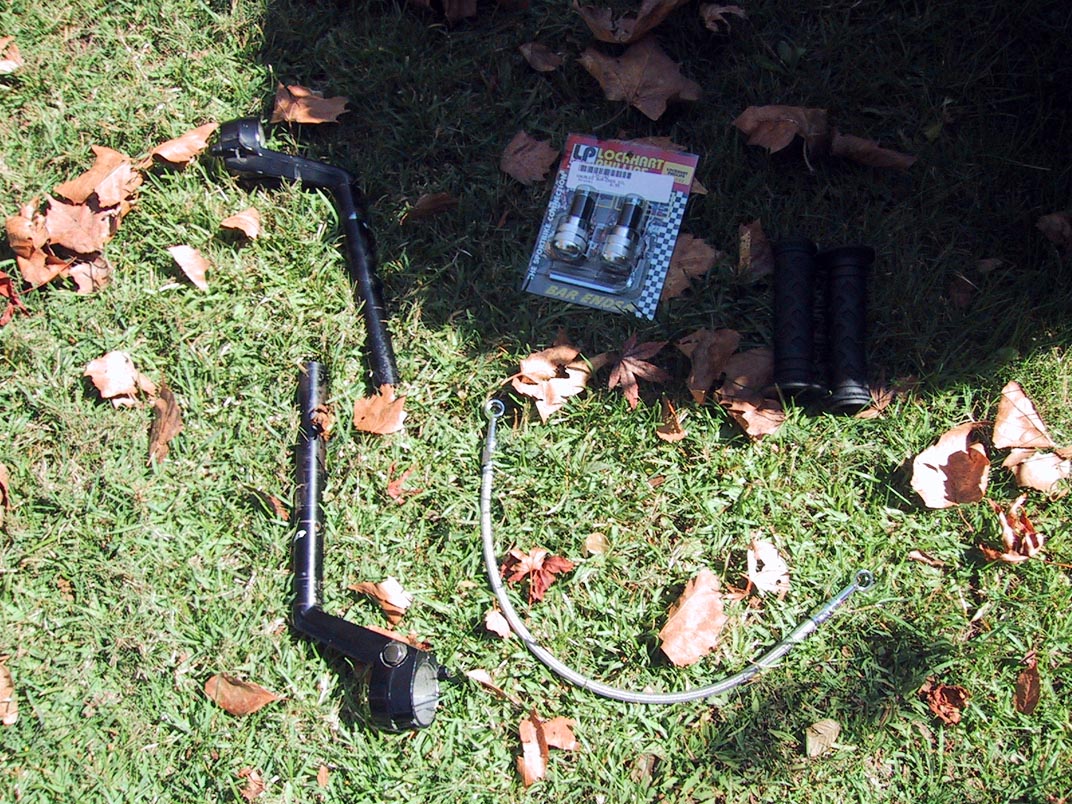
- New brake line, 13" or so.
- 2 banjo bolts for the new brake line: 1 straight, 1 35-degree angle
- 2 new handlebar grips
- 2 bar end weights
- 2 Hawk GT clip-ons, including internal weights
Note: Thanks to Astute Reader(tm) pjgvfr (whose real name I don't know), who suggests using a 1" L-shaped angle bracket for the brake reservoir mounting instead of the sheet metal.
background.
The SV650S has a very aggressive riding position, which, translated to layman's terms, means that the stock clip-ons are low
and far forward. As a short person with the corresponding short arms and torso, I found myself putting a lot of my weight onto
my hands and wrists while riding on city streets. The posture was especially bad at stop lights, where (unless it was a long light
and I was in neutral) my weight was all pushed forward onto my bent wrists. Unfortunately, months of riding in this posture started
to aggravate my wrists, and after my four-day ride up to Redding, the
pain was overwhelming. And constant. The wrist aches were declared tendonitis by my doctor, and I began wearing rigid braces on both
wrists while sleeping every night, in addition to more flexible braces during the workday. After three weeks of non-riding, the pain
had eased greatly, confirming my fears that it was, in fact, the SVS's riding posture which was causing the damage.
Since giving up the SVS was obviously out of the question, I started looking into ways to fix the riding position. I came upon Tom Chapel's SVS page, which included this write-up of how he swapped a pair of Hawk GT clip-ons onto his SVS. The outcome of his experiment -- bars moved up, back, and out -- seemed ideal for me, and so I emailed him. He supplied the idea, Gary from the Hawk GT mailing list kindly sold me his old Hawk clip-ons, PartsFish hooked me up with the missing internal weight miscellany, and new grips and bar ends came from Road Rider in San Jose. Two weeks and about $120 later, I was ready to swap my own clip-ons and see if the new ones helped my wrists.
Incidentally, if you're contemplating this procedure, I highly recommend buying as many of the parts used as you can. Out of curiousity, I figured out how much it would have cost me to order all of the Hawk parts new from Honda -- just about $300. And that's not including the new brake line, gel grips, or swank new bar ends that I got as well.
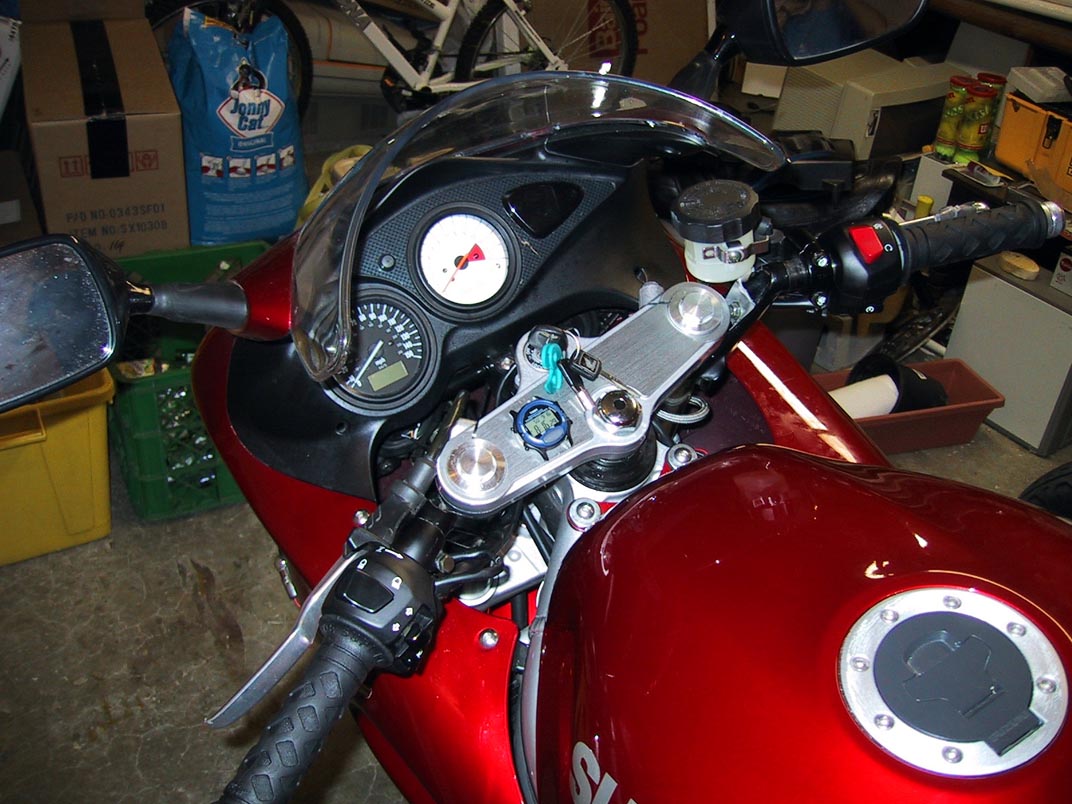
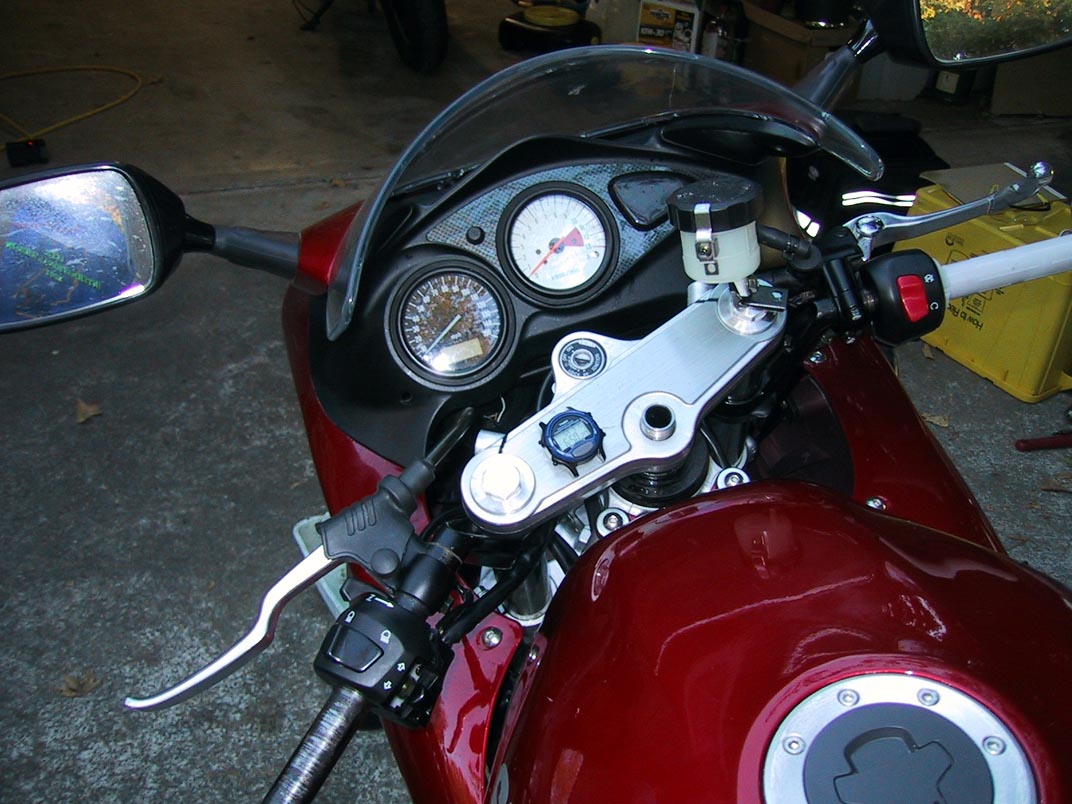
Here's the bike beforehand, with the stock clip-ons.
pre-procedure.
- Drain all of the fluid out of the brake lines and reservoir. This can be done either by bleeding the brakes or just by loosening the bolts holding each lower brake line banjo bolt to its caliper. If you do the latter, cover the front fender with a rag and make sure you have a suitable container underneath the banjo bolt to catch the fluid.
- Read through these directions and make sure you understand them. It's really a pain to have to redo your steps later (though, honestly, you probably will have to at least once or twice).
procedure.
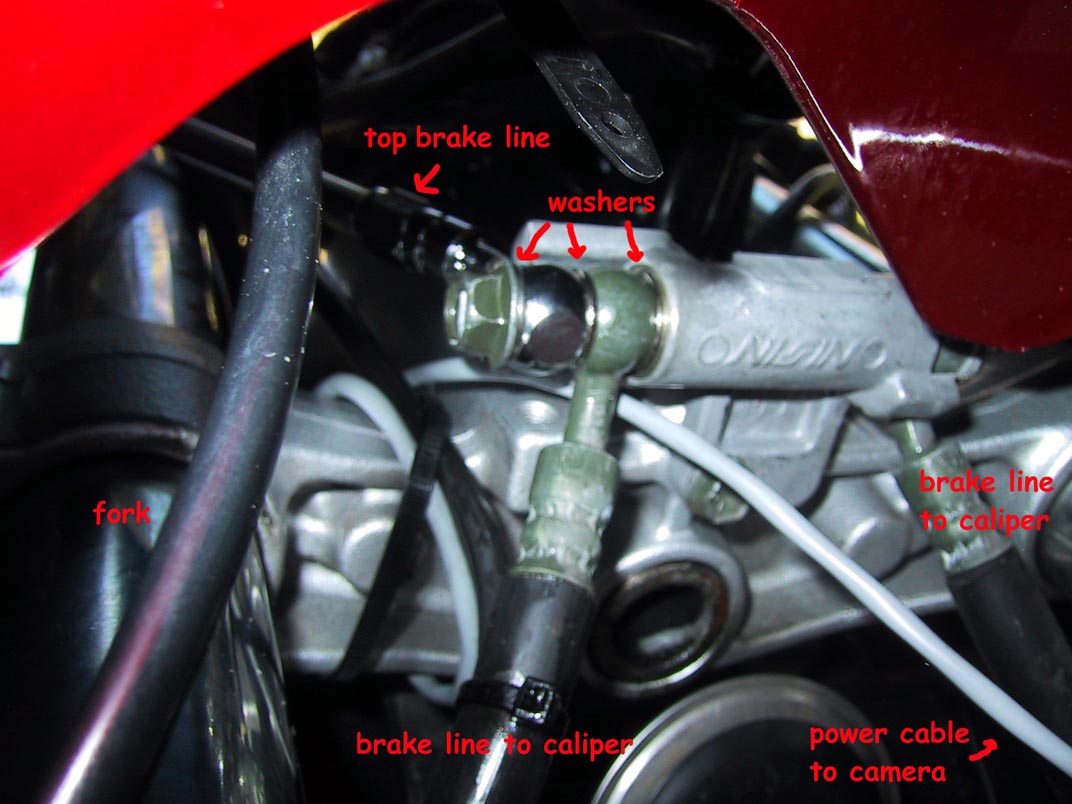
The first item of business, after you've bled your brakes, is to remove the stock brake line. Put a rag or old T-shirt
over the front fender, since there may still be a little bit of brake fluid in the line. Use a 10mm socket to remove
the bolt holding the banjo bolt on the top of the brake line. Be careful; there's a thin washer between the banjo bolt and
the master cylinder, and you don't want to lose that. The bottom of the brake line connects to a junction which splits
the fluid into two more brake lines, each going to a caliper on the disc brakes. Two of the three brake lines are held in place
by one long bolt; the one we're removing is on the end, meaning that you'll have to pull the bolt through the other
banjo bolt (and both lines' respective washers!) before you can remove the top brake line. Just be careful not to lose the washers that
fit in between the banjo bolts.
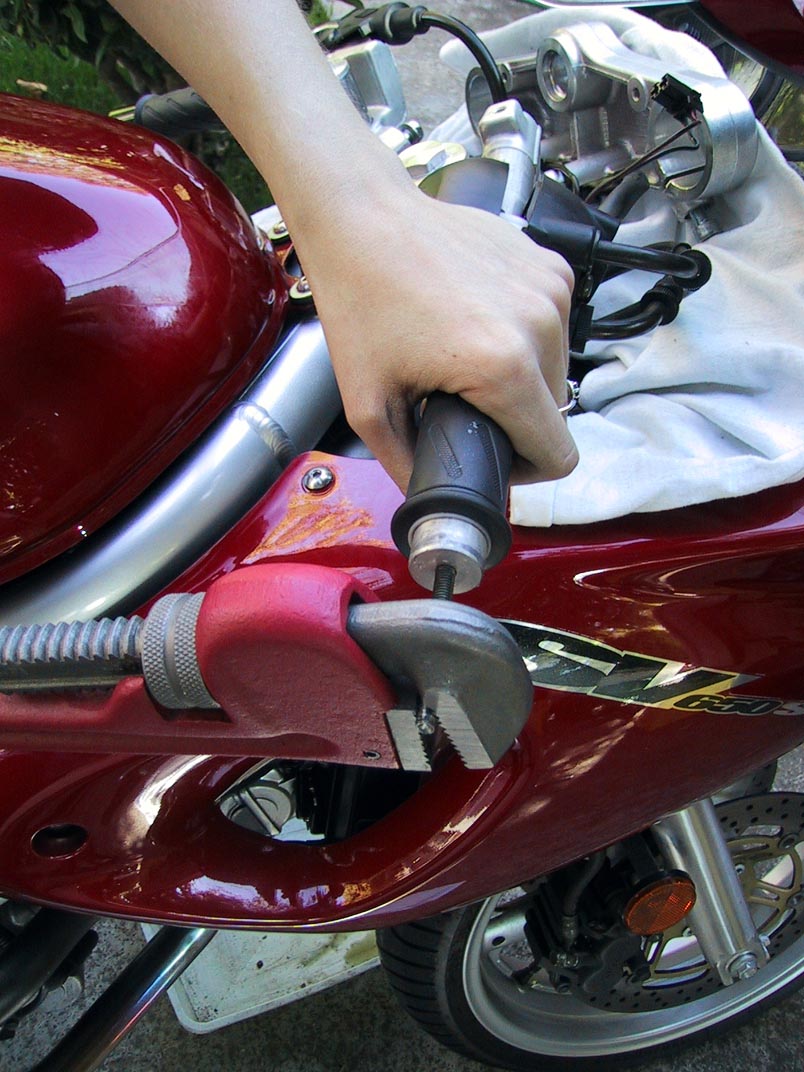
The next step is to remove the stock bar ends and grips. This sounds easy. Maybe you'll be luckier than we were, and it will be easy for you. I'll explain what Peter and I ended up having to do, and that way, you can send me "neener neener" emails when your bar ends came off with nary a complaint. Normally, one would assume that you could insert a Philips screwdriver into the Philips screw in the bar end, unscrew said screw, and remove the bar ends. Not us. We couldn't budge those screws for love or money -- not with breaker bars, not with mallets, not with prayers. The short version is that we gave up, used our screw extractor kit to drill a hole in the screw, and tried to remove the screw with the screw extractor. It wouldn't even come out that way. Finally, the head of the screw popped off, enabling us to remove the barend....but we still had this screw sticking out of the clip-ons. Fortunately, Peter's huge ass pipe wrench finally managed to get the screw out. All this just to take the bar ends off. I'm hoping that won't be the case for yours.
Luckily, getting the grips off is easy by comparison (not that most things wouldn't be). Peter decided to be all manly and pull the left-hand grip off, but afterwards quickly decided to just cut the right-hand grip. Either works. A sharp hobby knife will slice through the grip nicely, and will save your wrists the effort of yanking on glued rubber.
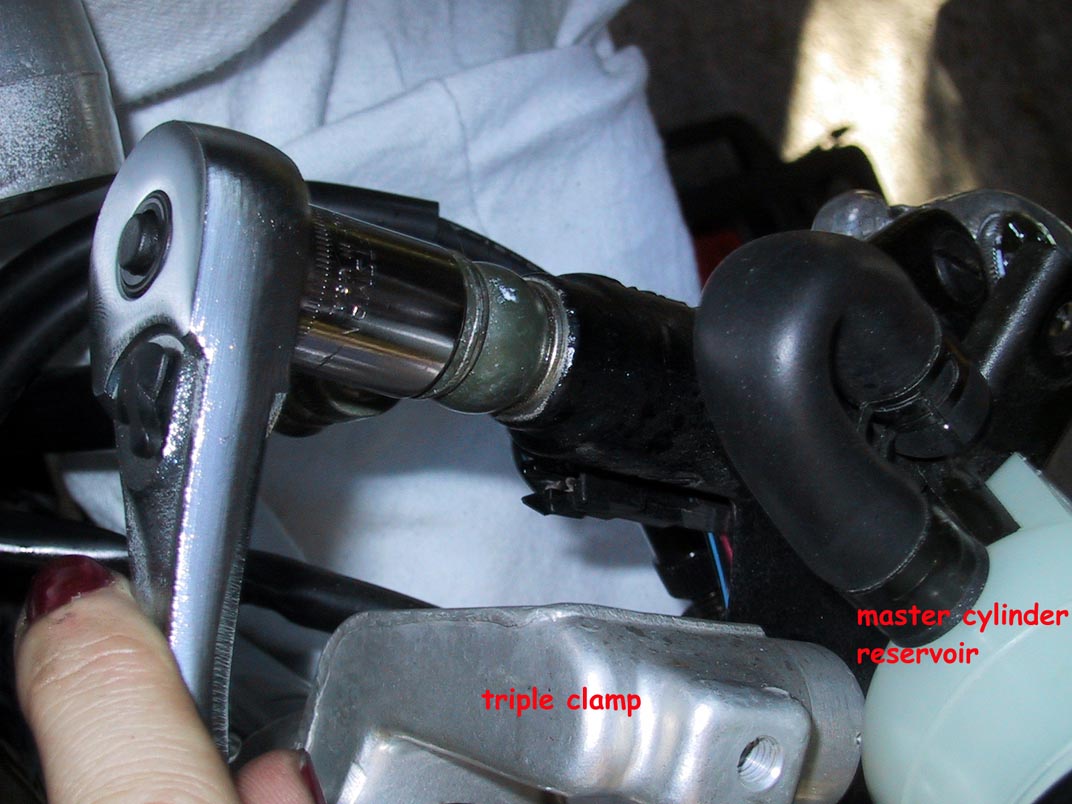
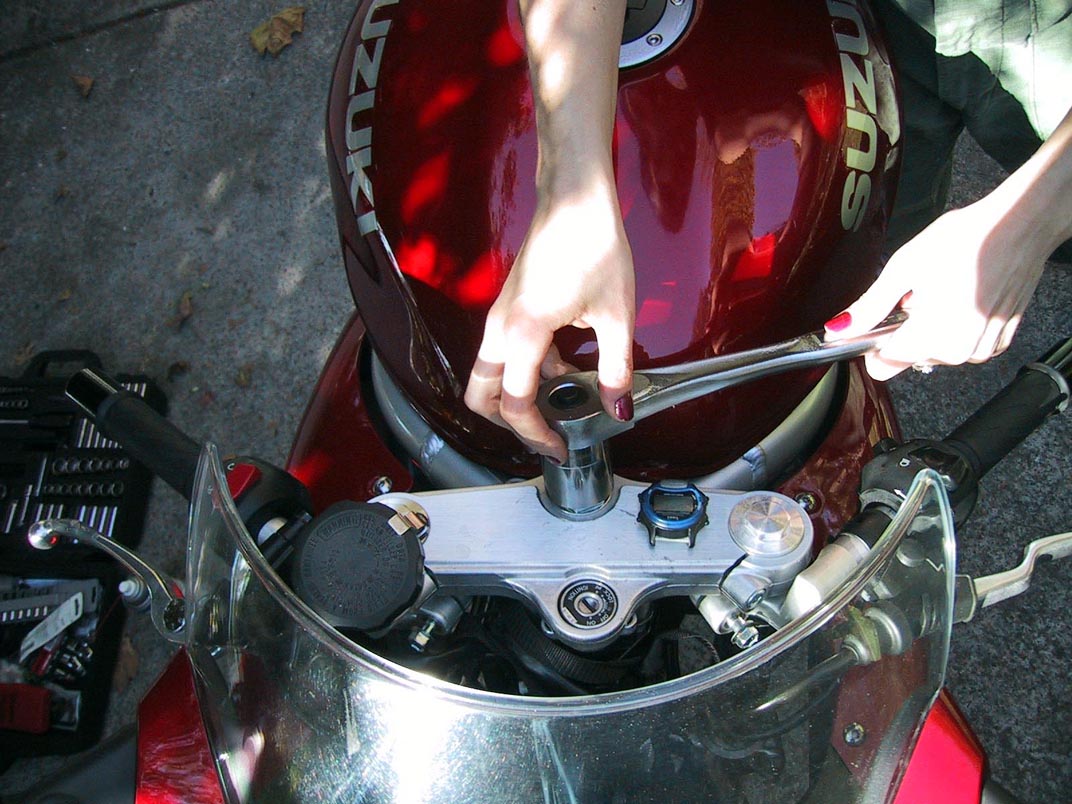
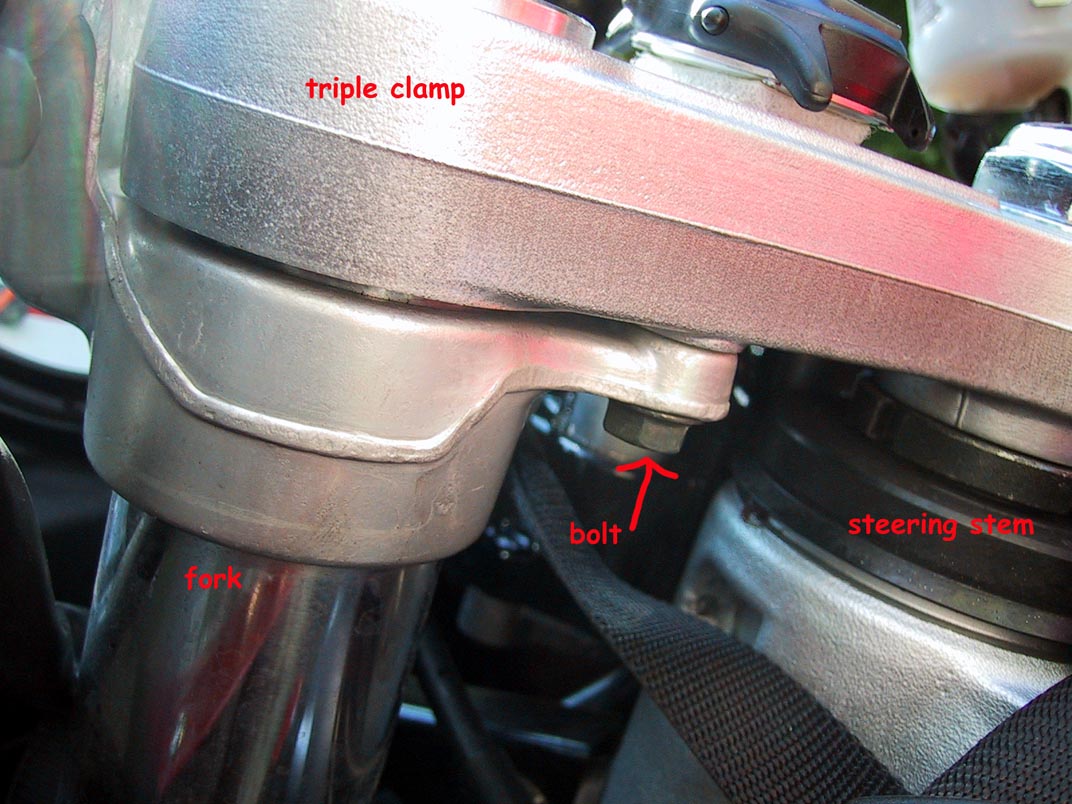
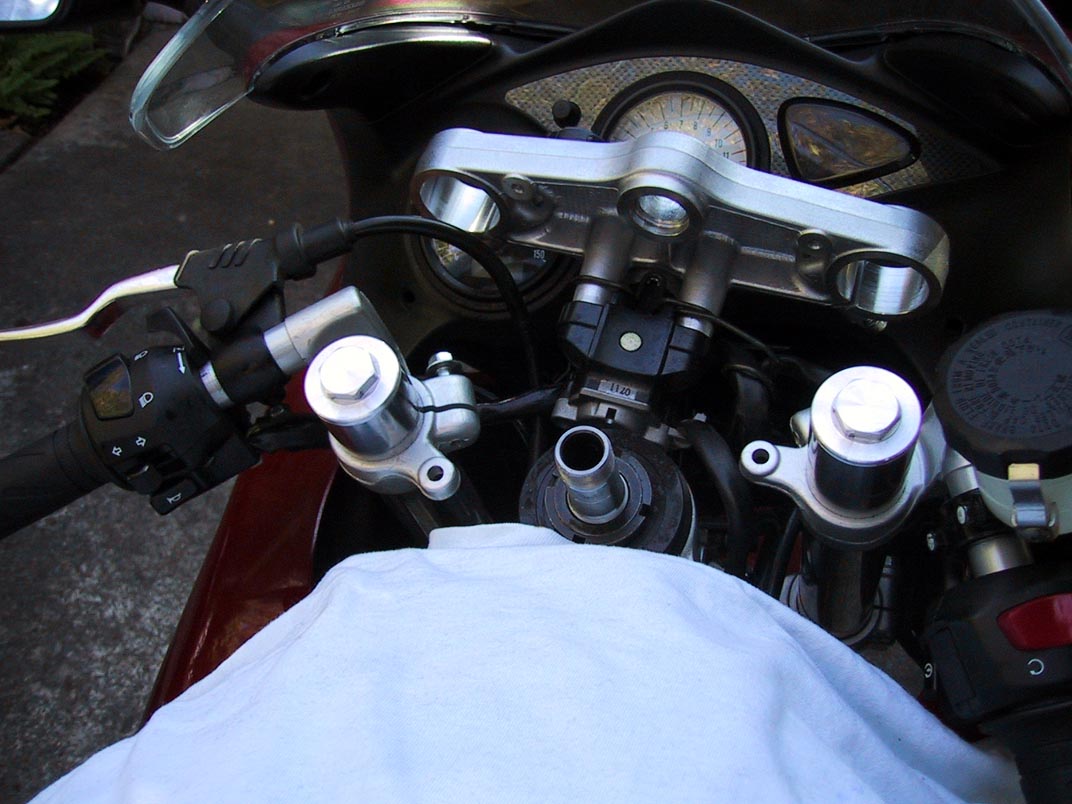
After the brake line, bar ends, and grips are off, you're going to remove the steering stem nut. This is so you can remove the triple clamp, but we'll get to that. The steering stem nut takes a 30mm socket. Next, you're going to loosen up the bolts that hold the triple clamp tightly on the fork; these are 6mm hex bolts. You don't need to remove these bolts; just loosen them up most of the way. There are also two bolts underneath the triple clamp, one on each side, which connect the clamp to the clip-ons. Remove both of these bolts, and put them somewhere that you won't lose them; we'll need them again later.

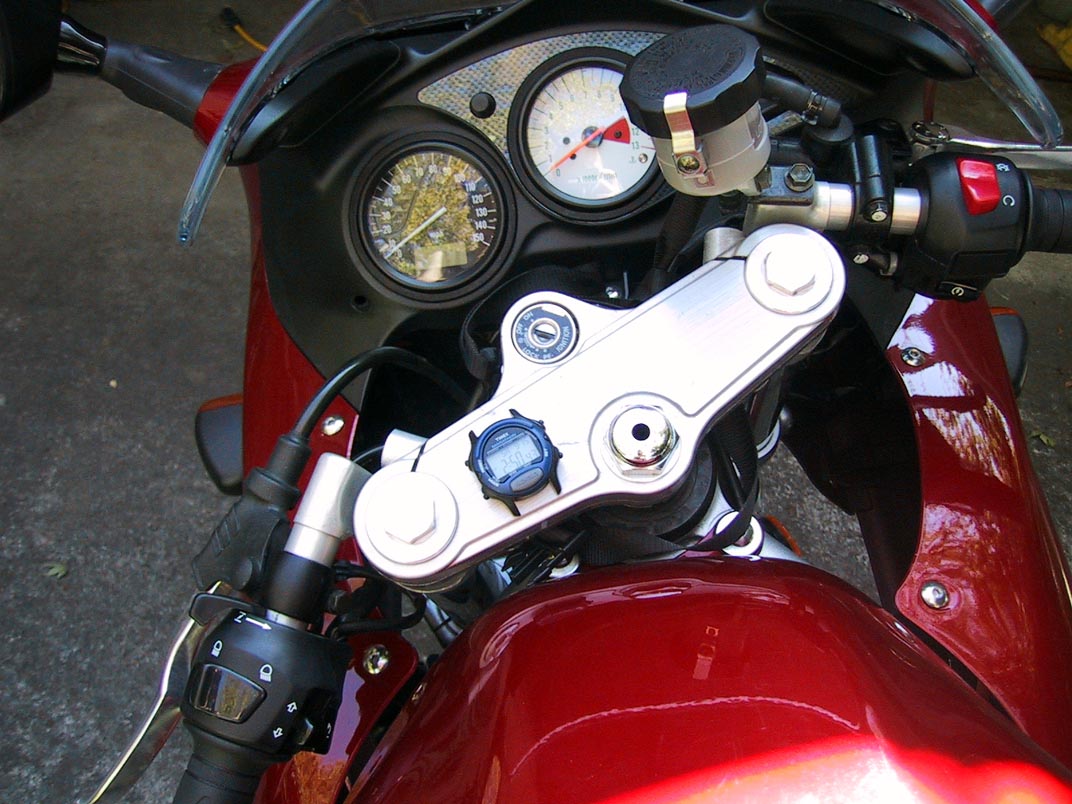
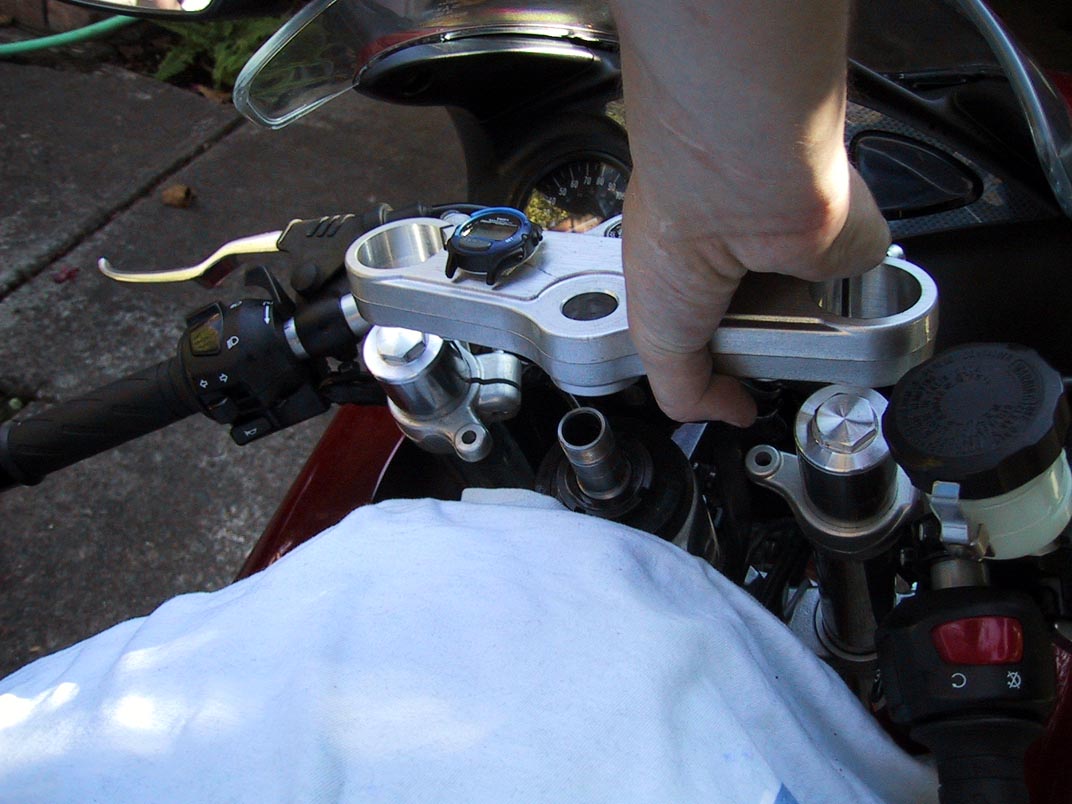
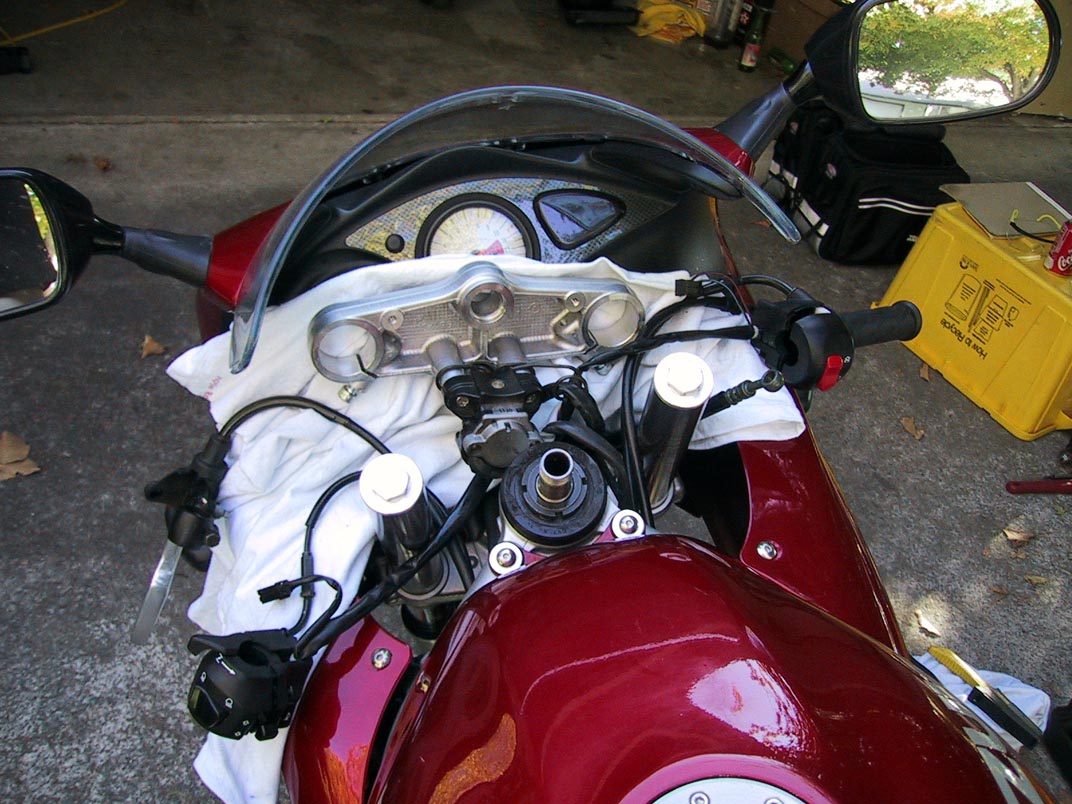
Next, remove the triple clamp by pulling straight up on it. You might need to wiggle it a little bit. Put a rag or T-shirt in front of your instrument panel, and lean the triple clamp back against it, out of the way. The ignition and all its wiring will still be attached, so don't yank on it or anything. You might note that in the second picture, I haven't put a T-shirt down like I suggested. This is a matter of "do as I say, not as I do", since I ended up with a scratch on the tachometer. Whoops.
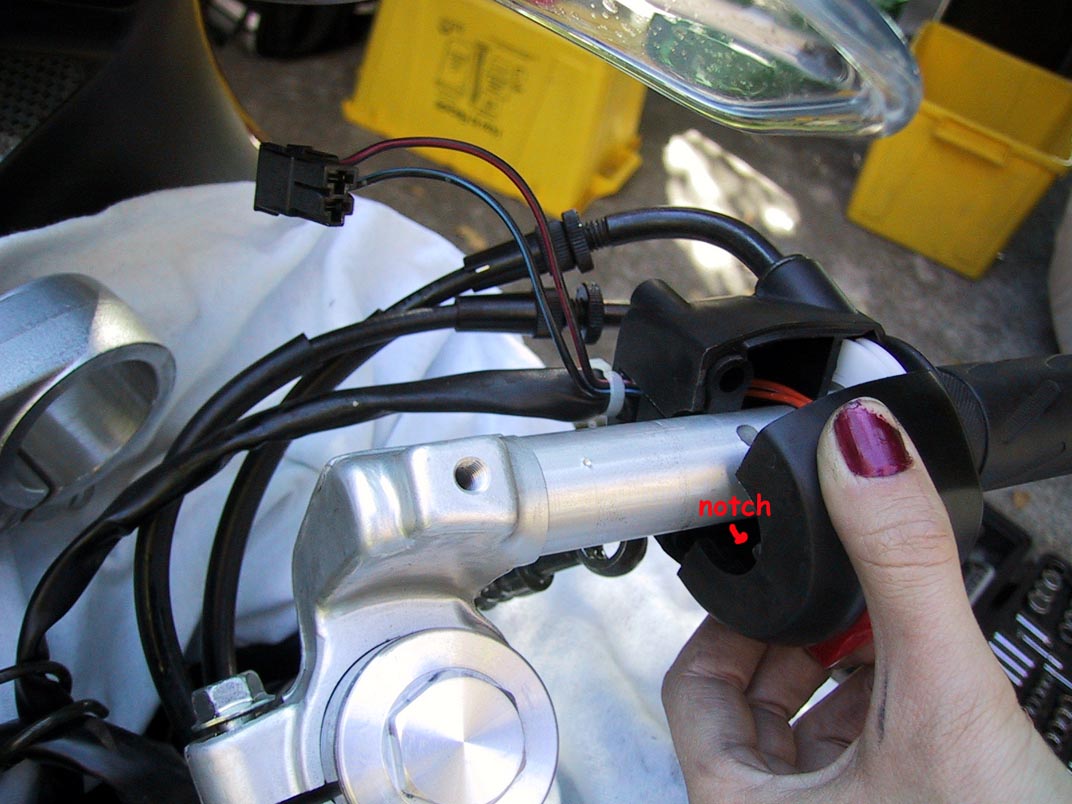
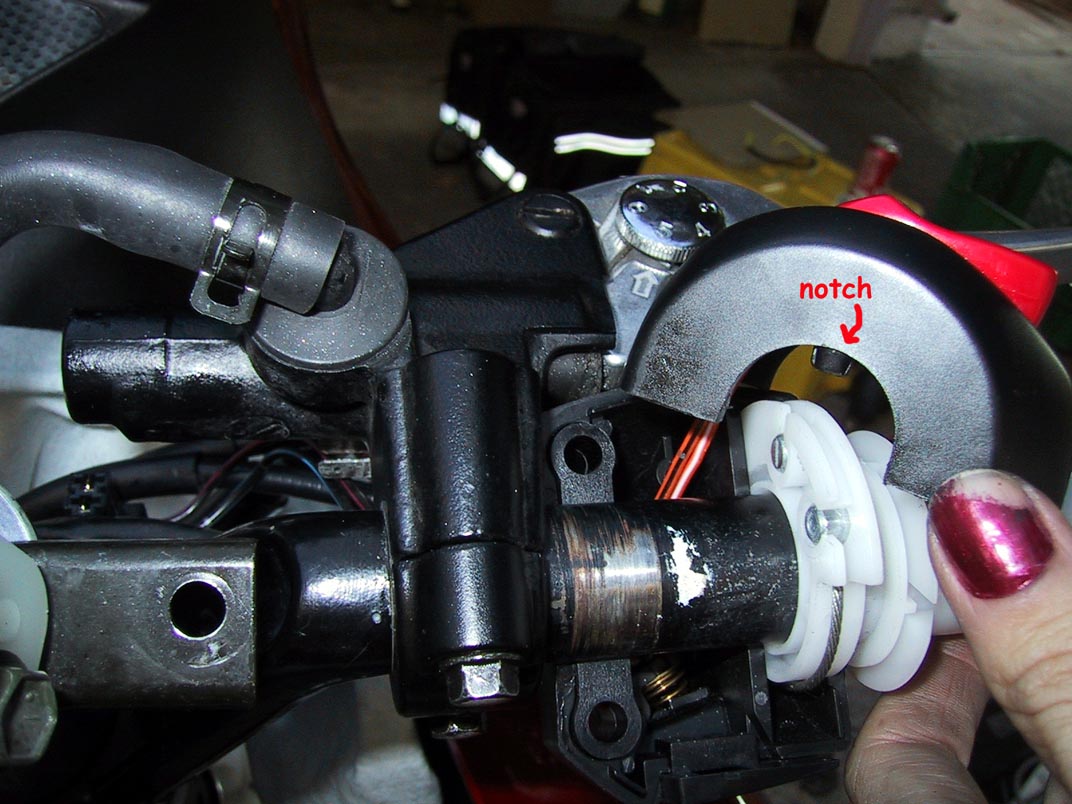
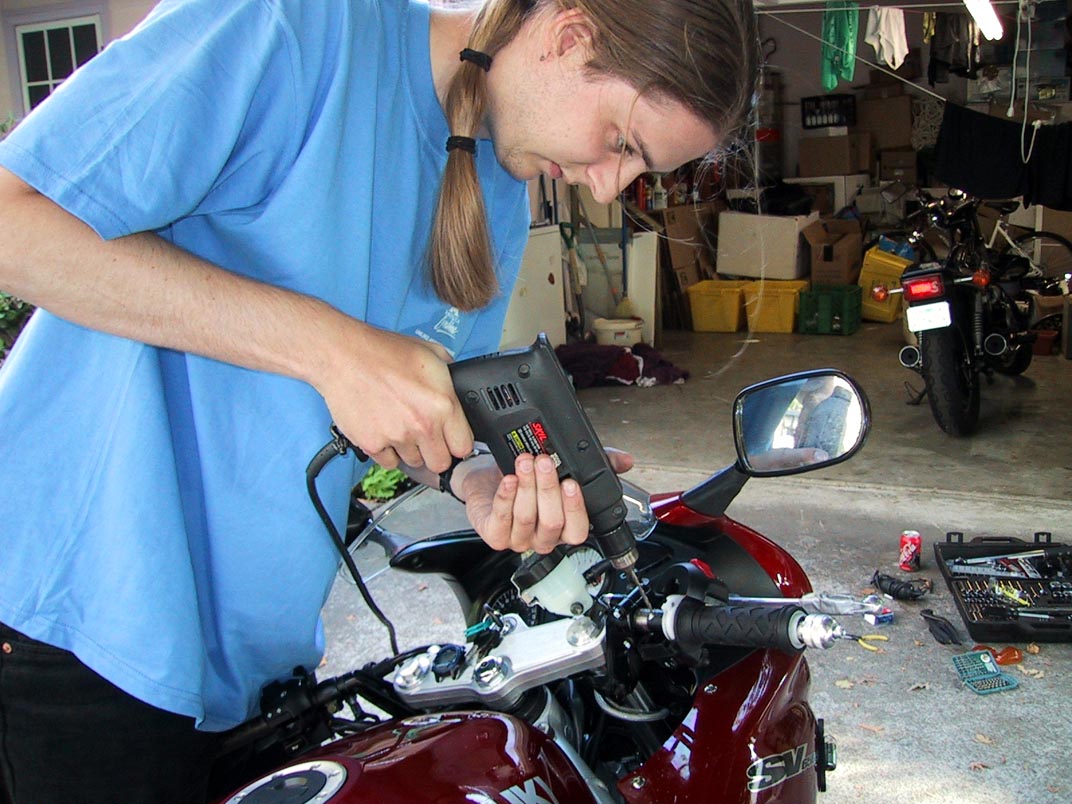
Alrighty, still with me? Next up, use a Philips screwdriver to loosen all of the handlebar controls. Those that can be entirely removed from the clip-on, do so (I want to say that this is only the brake lever). When you loosen up the controls on the righthand clip-on, take note of a little plastic notch on the inside of the inside lip of the control, and the corresponding hole in the clip-on for it. You're going to want to remember about this. Now, take your 12mm socket and loosen up the bolts that hold the clip-ons tightly to the forks. Again, you don't need to remove them entirely; just loosen them. Once you're done with that, you should be able to slide each clip-on up and off of the fork. Slide the controls off of the clip-ons, and congrats, you've got the old bars off. I'm also showing a relatively poor picture of me holding one of each clip-on, so you can see the difference. It's pretty obvious from the picture how the Hawk clip-on (the black one) is much taller and is angled more.

OK. Now to put the new bars on. We're going to tackle each bar separately; let's start with the right-hand one. First off, slide the controls onto the new clip-on, and then slide the bar over the fork. Put the bar in the position that you want it, and tighten the bolt to hold it in place. Hold the brake lever where you want it to be -- remember that when you're in a normal riding position with your hand on the grip, your wrist should be as straight as possible. For me, this meant angling the brake lever down quite a bit. While holding the lever (it helps to have two people here), put the electrical controls where they will go. Before you go any further, you might want to turn the wheel to full left lock (trickier than it sounds without the triple clamp) and make sure that your bits clear the windscreen. Tom Chapel notes on his site the tendancy for the windscreen to create the nice feature of hitting the engine kill switch at full left lock -- if this is the case for you, you might want to angle the electrical controls a little, or move them out slightly, to avoid this. You won't be able to screw the two halves of the controls together yet, because of that plastic notch you saw earlier. What you'll have to do is figure out where that notch hits the clip-on, and drill a hole in the clip-on for it. This is easier than it sounds; you just have to make sure that you're doing it in the right place. You don't want more than one hole in the clip-on (perforated handlebar = bad), so you only have one shot at this. Once the hole is in place, you can line up the notch and screw the two halves of the controls together. Don't forget to screw together the brake lever mounts, too.
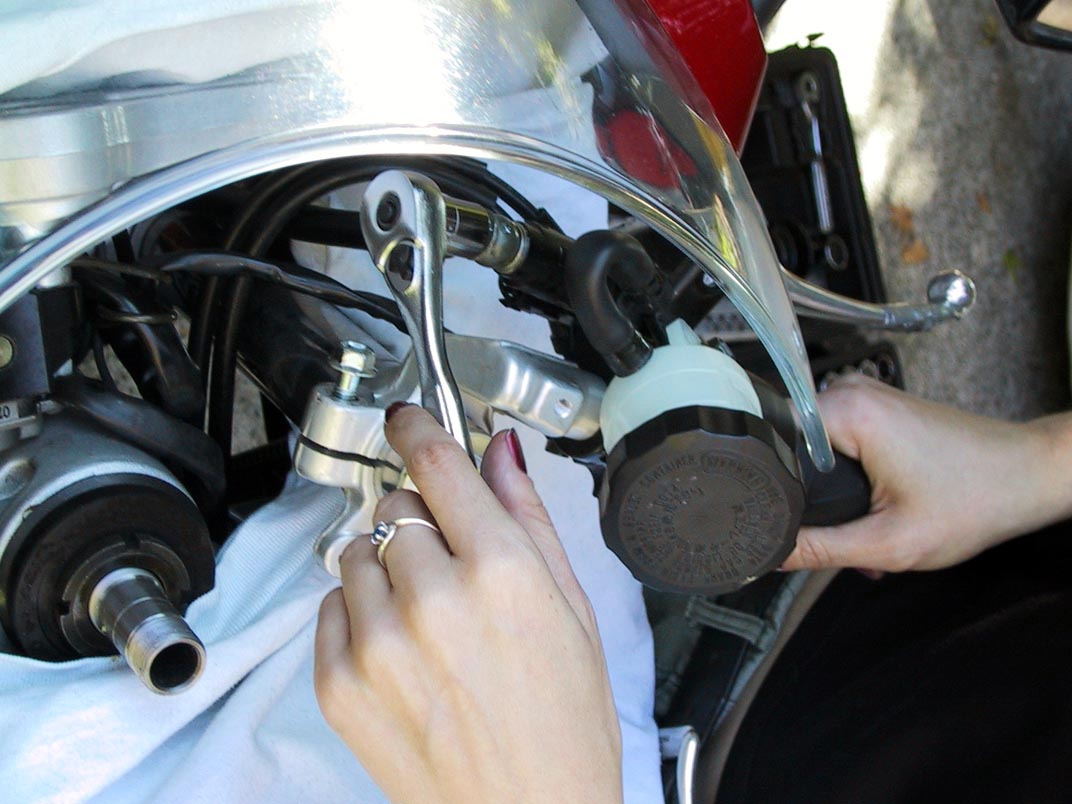
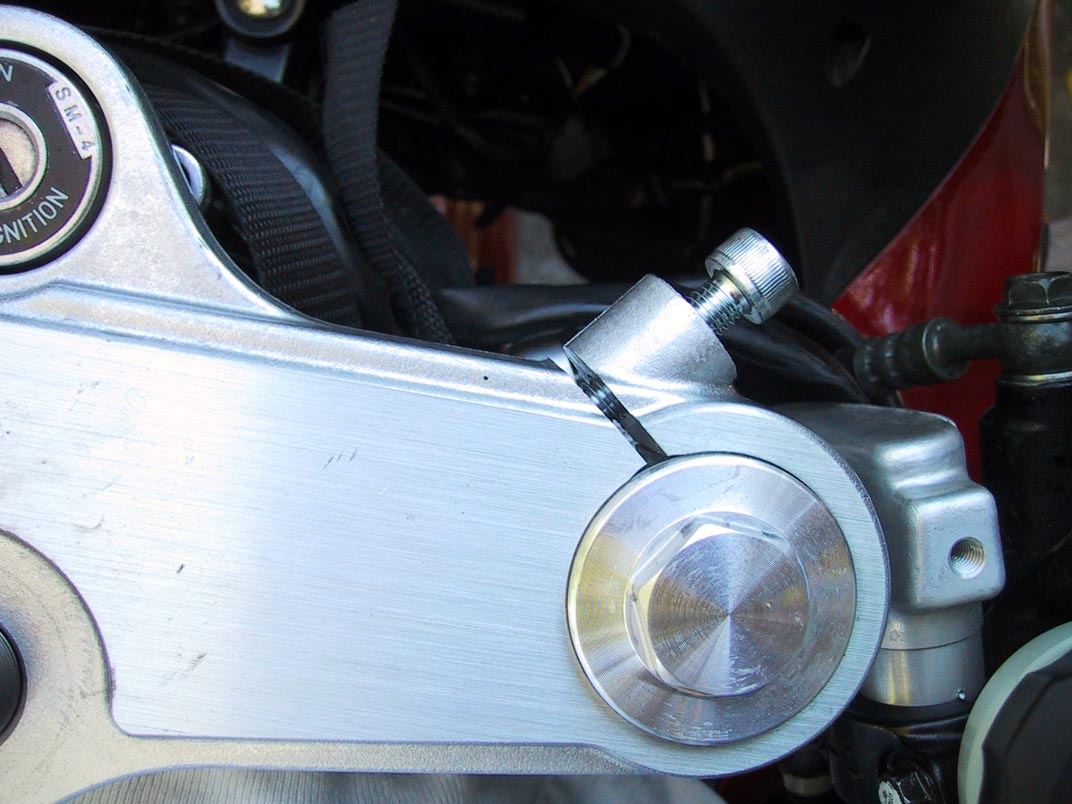
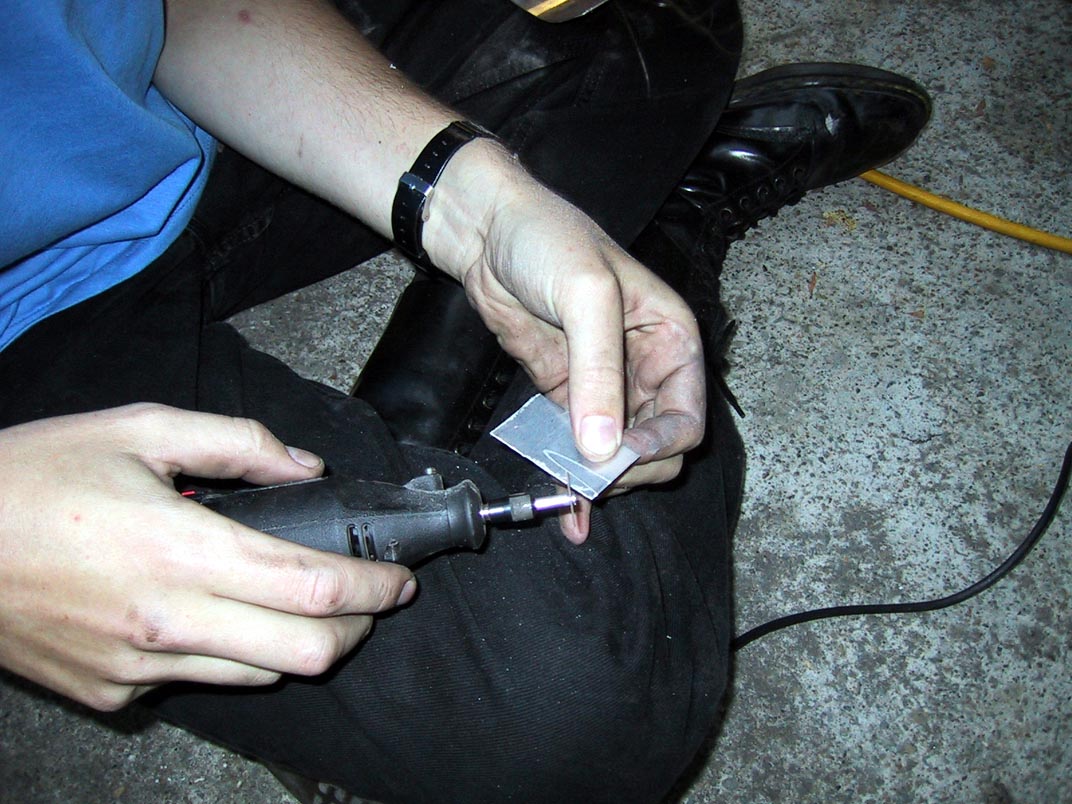
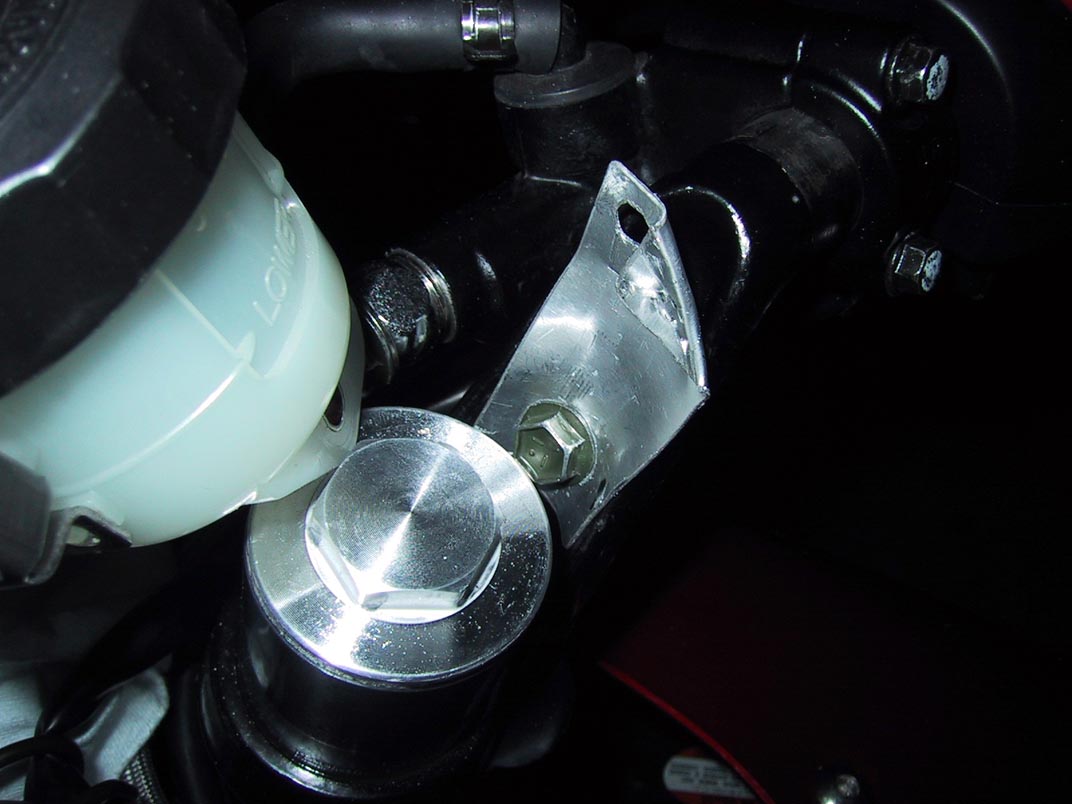
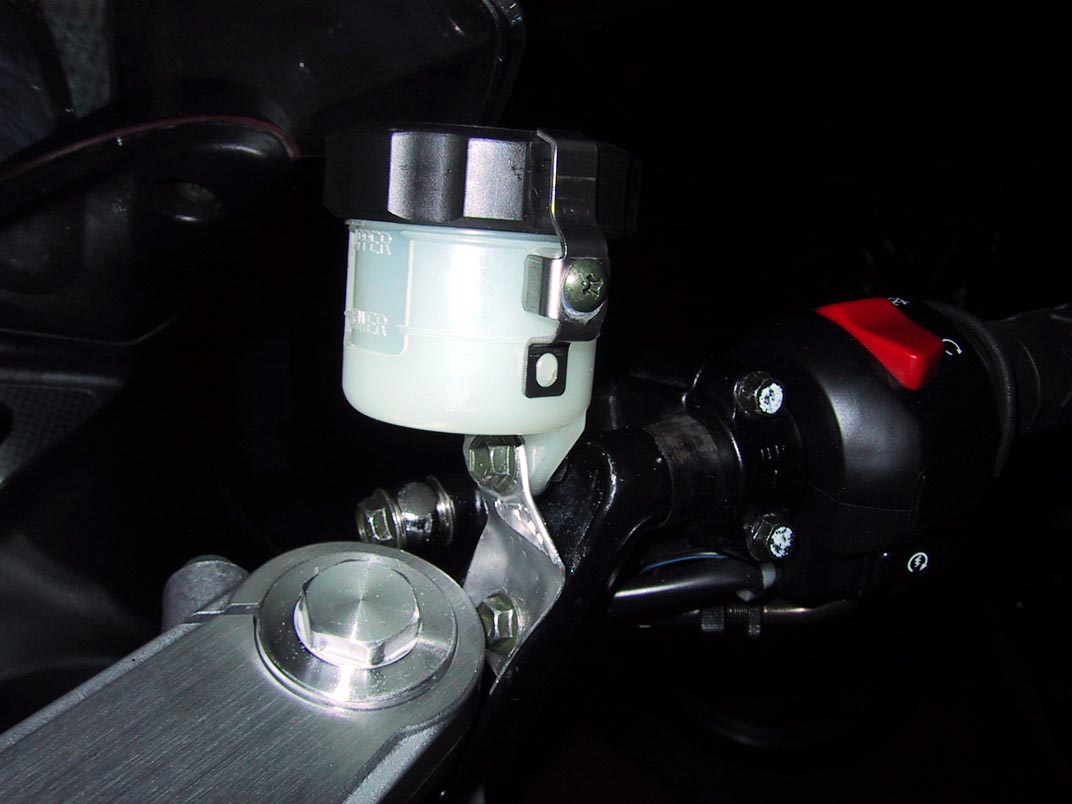
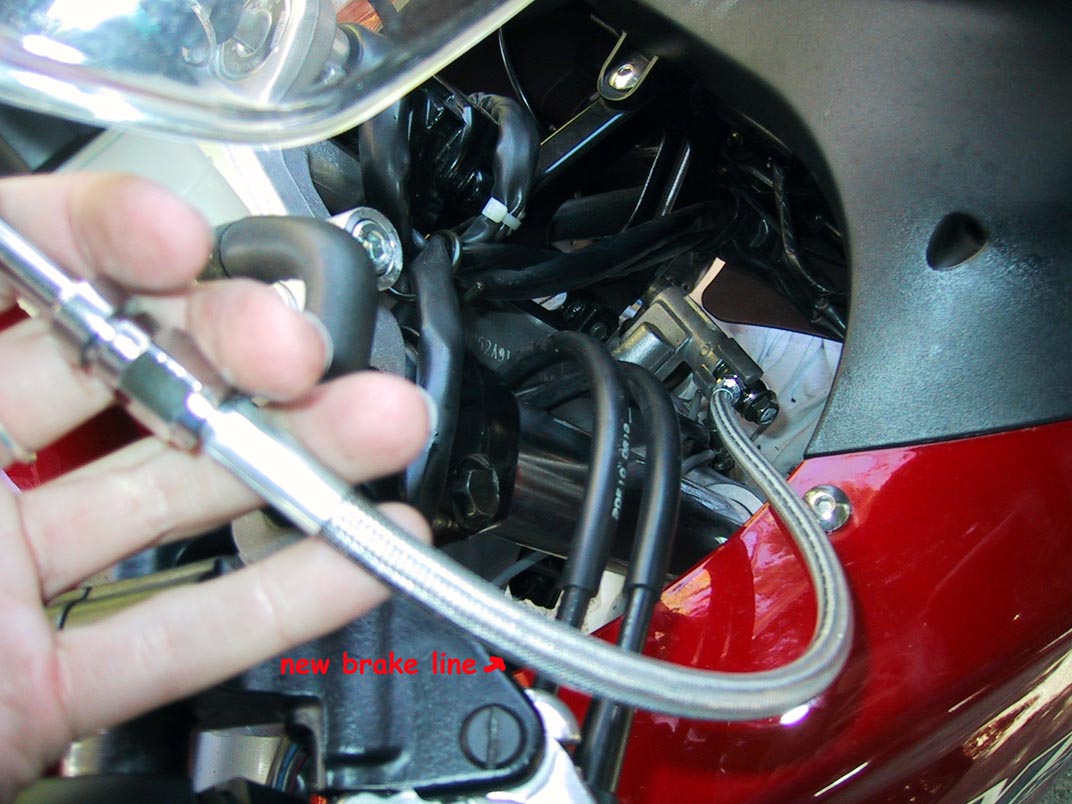
OK, we're almost done with the right-hand bar. You'll notice that you can't use your old mounting bracket for the master cylinder brake fluid reservoir anymore, so you'll need to whip up your own. This is really easy; just cut a piece of not-easily-bendable sheet metal into a rectangle (roughly 1" by 2", but eyeball measure for yourself). You'll bolt the reservoir to one side of it, and bolt the other side into the hole in the clip-on stalk. We used our Dremel to cut the sheet metal, and the bolt that held the old clip-ons onto the triple clamp to attach the new bracket to the new clip-on. Attach the new brake line: the angled banjo bolt goes on the bottom, and the straight one connects at the top. If your line is too long, like mine was, wrap it around the right-hand fork once, or otherwise bend it out of the way. As long as there isn't a kink in it, you'll be OK.

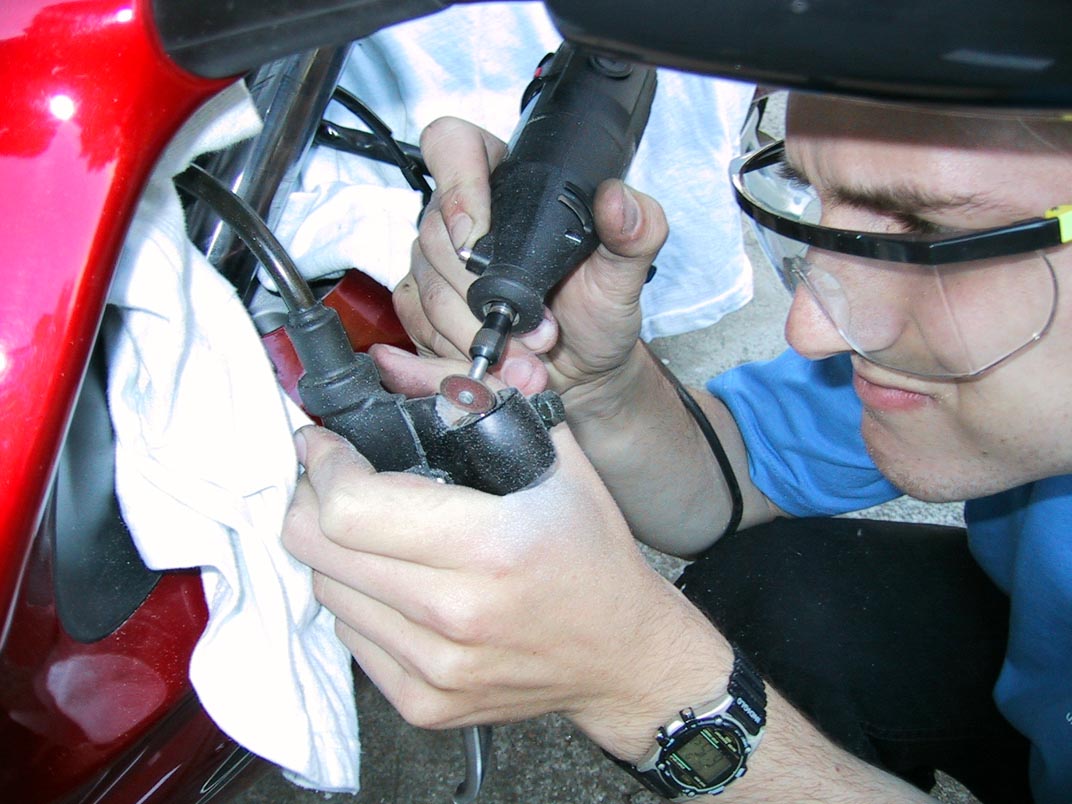
Now, on to the left-hand clip-on. You'll notice that you can't push the clutch control all the way up against the end of the grip, so you'll need to Dremel part of the control away. This is fairly tedious -- you have to pull off the clip-on, slide the control onto it, check it, remove the control, Dremel it, slide it back on the clip-on, check it, etc. As you get close to done, put the bar onto the fork and hold the clutch lever in the position that you want it. Again, remember that you want your wrist as straight as possible when in a normal riding position. The reason you want to check the lever position is that if you want the lever angled down more than a certain amount, you'll need to Dremel out part of the underside of the controls, too. Fun fun. Just take your time and check often, and it's not that hard.
Once your clutch lever is adequately Dremeled, go ahead and put the clip-on onto the fork and tighten it down. Tighten the screws for the clutch lever as well. Now you'll have to do the same drilling that you did for the right-hand lever; hold the left-hand electrical controls where they will go, look inside to see the notch (it's a little hard to see because the choke is in the way), note where on the bar the notch will be, and drill the hole. Again, you've got one shot to get this hole right, so take your time. Then, just mount the electrical controls and tighten the screws that hold it on. At this point, go ahead and replace the triple clamp and torque down the steering stem nut.
Woo! You're basically done now! All you have to do is put on your new grips and bar ends. This is more grunt work than anything, but remember to check the inner diamter of your grips -- the one with the larger inner diameter hole goes over the throttle, and the smaller inner hole goes over the left-hand bar. That'll save you some annoyances. The bar ends will just screw onto the ends of the bars -- you might have to Dremel off the end of the screws (mine were too long), but definitely try them as-is first.
That's it! You've got new, higher, more comfortable bars that your wrists will thank you for. :)