| bluepoof.com
email me
installing a new chain
Time needed: a couple of hours for your first time. This doesn't include time spend on pre-procedure stuff, which I mention here but don't cover in detail.
- A new chain
- A master link, O-rings, and clip (this should all come with your new chain)
- Chain breaker/installer tool
- Dremel
- Box wrench that fits your chain breaker (if you have a screw-type tool)
- Mallet (if you have an impact chain breaker)
- Vise, pipe wrench, or some other way to hold the chain tool immobile
- Sharpie or other permanent marker
background.
A week ago, Mark and I decided to swap the SVS's worn chain and sprockets for the new ones I'd bought.
Just at that point where it wasn't worth turning back, we realized that the Suzuki shop manual -- which has many
fine and redeeming qualities -- makes no mention whatsoever of chain removal or installation. Sure, it'll tell you
how much slack your chain should have, and will tell you to replace it once it hits that wear point...but it won't actually
tell you how.
Many unfortunate things happened over the past week, all stemming from this lack of any sort of clue whatsoever about what we were doing. Assuming that at least one other person in the universe is an idiot and has no idea how to install their new chain, I have put together this little tutorial. Please note that it only covers the actual installation of the new chain, and not the fifteen million steps leading up to this point. My apologies for that. Someday I hope to add more detail, but not until after the memories of the past week are good and repressed.
pre-procedure.
In order to install your new chain, you'll have to remove your old one -- hopefully this comes as a shock to no one.
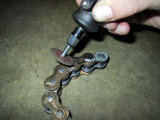
Here's your rough idea: Dremel the sucker clean off.
The manual will help you through the rest of the steps:
- Put the bike on a rear stand (or centerstand, if'n you have one)
- Remove the plastic case on the lefthand side of the bike, right above the shifter (Not the crankcase. The one behind it.)
- Put the bike in neutral
- Grab an end of your freshly-Dremeled old chain
- Pull
Removing the rear sprocket is easy, since it and the hub will immediately fall and stab you in the shin as soon as you remove the rear wheel. Just remove the mounting nuts and bolts, and you're good to go. Don't be dumb and cross-thread the nuts when putting them back on. I've heard. From friends.
procedure.
OK. Let's say that you've managed to remove the front sprocket nut and have put on your new front and rear sprockets.
Your rear wheel is back on, and now you're sitting there staring at this amazingly heavy box full of brand-new DID chain and have no clue what to do.
First step: remove the chain from the box. It'll be all greasy and nasty, so wear rubber gloves if you care about things like that. Also inside the box should be a small plastic bag containing a master link, 4 O-rings, a clip, and a small packet of grease. Take it out and put it somewhere useful.
Now, go ahead and thread the chain around the front sprocket. There's no clean way to do this; you'll have to do some amount of fishing around to pull it through. Again: rubber gloves.
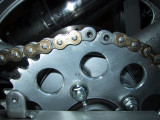
Wrap the chain around the rear sprocket. You will soon notice that it is too long. Take a look at your wheel; is it pushed all the way towards the front of the bike? If not, do that now. Wrap the chain around again and determine exactly how long the damn fool thing is. On an SV650S, it'll be a good 8 links or so too long (don't take my word for it, though -- measure it yourself).
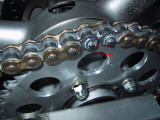
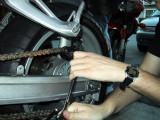
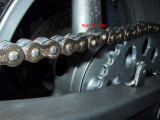
It's a little tricky to tell what length the chain should be, but here's how to make a good first pass at it. Turn the rear wheel so that the end of the chain is somewhere on the top of the rear sprocket. With your Sharpie, mark the link that winds up at the neighboring sprocket tooth. That's the link that will become the other end of your chain -- the master link that came with the chain will connect the two ends. When in doubt, guess the link that will make the chain longer. You can always adjust out slack, or even Dremel off another link later.
Now that we know where the end of the chain should be, it's time to actually make that link the end of the chain. This is a two-step process: Dremeling off the existing rivets and popping out the pins. Pull the chain off the bike and find a large, smooth surface for it.
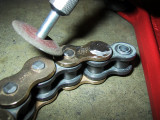
First, we'll Dremel off the existing rivets. It's as simple as that -- keep on Dremeling until you have a nice smooth (or slightly recessed) surface.
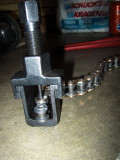
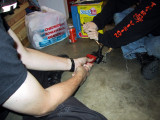
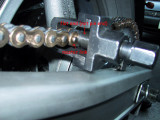
Now we use the chain tool to push out the pins. Each chain tool is slightly different, so I won't go into the mechanics of this particular one (it isn't even mine; I'm borrowing it from co-worker Justin). Your chain tool should, however, have a "pin" end and a flat end that you can strike with a hammer or screw down with a wrench. Mine is the latter version, so that's what's in the pictures. Line up the pin end over the link, directly over the ex-rivet. Give it a whack with a hammer or, like my tool, use a box-end wrench to screw the pin down into the link. No need to go all the way through; a half-centimeter or so is more than enough.
Next, move the chain tool so that it's lined up over the link's other ex-rivet. Repeat the above procedure. When you remove the chain from the tool, the old link should fall apart in your hand. If it doesn't, repeat the above two paragraphs.
Thread the chain back onto the front sprocket and turn the wheel around until the ends of the chain are both on the rear sprocket. With any luck, they should be on neighboring teeth.
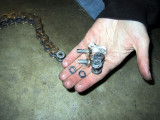
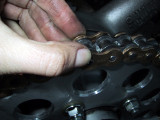
Go find that little baggie of master link stuff that came with your new chain. Open it up, taking care not to lose any of the four rubber O-rings. Pull out the plate with the two pins attached to it, two of the O-rings, and the packet of grease. Open up the grease packet and coat the O-rings, then slide one O-ring onto each of the two pins. Push the pins through the two open links in the chain so that the pin ends are facing outwards.
Grease the remaining two O-rings and put them on the ends of the two pins. Press the front plate onto the pins -- the grease from the O-rings will hold it in place.
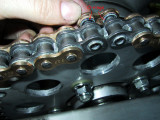
If you look very carefully at the pins, you'll notice that there's a little ridge that goes around each one. The trick now is to compress the link enough so that the ridge pops out -- we're going to be installing the clip underneath it. The best way to do this is to use your chain tool again. This time, use the flat (not pin) end of the tool. Line it up so that the flat part hits the middle of the link, right between the pins. Tighten it down until you can see the little groove on the pins -- the more you compress, the easier it'll be to get the clip on.
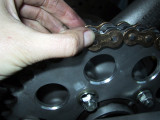
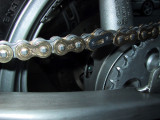
Once you've compressed the link, go ahead and remove the chain tool -- the link will stay compressed. Install the clip with the closed end facing the front of the bike: put the lefthand pin inside the big opening in the clip, with the open indented end pressing up against the righthand pin. With a pair of pliers (we used vice grips), squeeze the clip to the right so that it pops over the righthand pin. This will probably take a few tries.
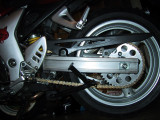
That's it! Once your clip is on, you're good to go. You'll need to adjust the chain, obviously -- there's probably still some slack that you'll need to take out -- but your new chain is on!

