email me
Installing an ATO/ATC fuse block
Time needed: 10 minutes max if you're just installing the fuse block; a few minutes more if you need to re-route existing wiring to go to the block instead of to the battery.
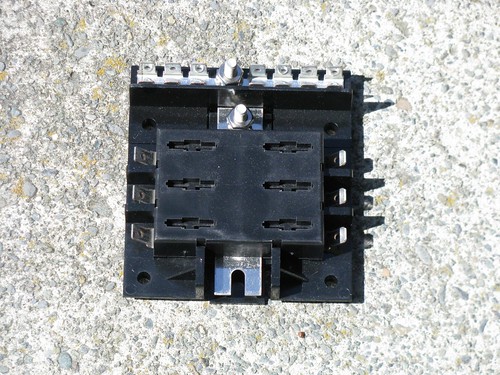
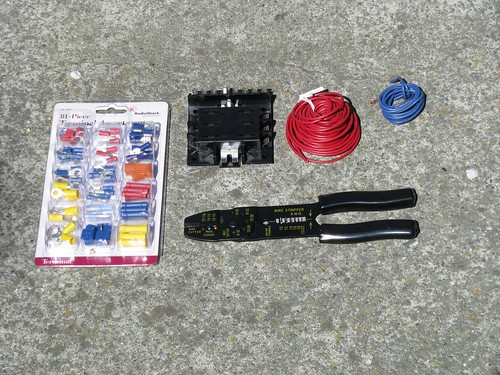
- Six gang ATO/ATC fuse block (I ordered mine from Overton's)
- A pair of wires to run from the fuse block to the battery; I used 14 gauge.
- Four ring connectors; make sure they fit over the fuse block posts!
- Wire stripping tool
- Adhesive-backed velcro
background.
I have a ton of electrical accessories on my bike and it was getting difficult to fit all of the connectors onto the battery post screws. Plus, a fuse block allows me to have the fuses in one place for easy inspection.
procedure.
The first thing you want is a naked bike. Remove the seat and the fairings over the airbox.

I wanted to mount the fuse block where the toolkit used to be, so I set it in place first and replaced the seat; everything fit all hunky-dory like.
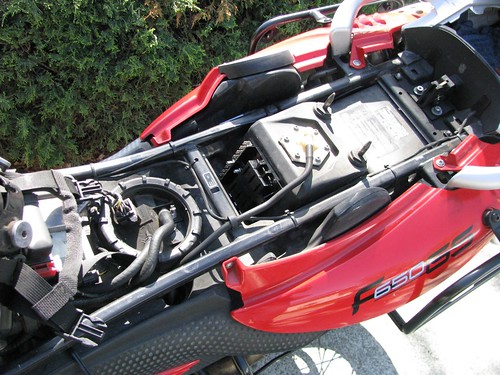
Disconnect the battery terminals and remove any electrical accessories that are already wired up to the battery.
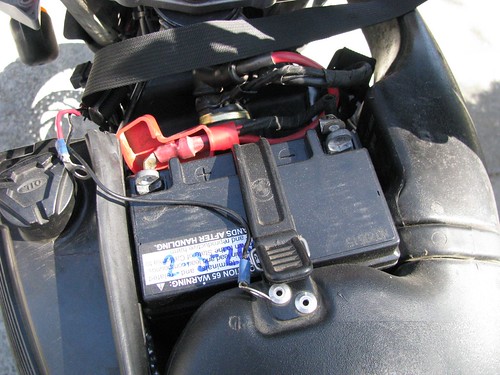
Route your new wire from the fuse block up to the battery. I chose to use two colors so I could differentiate between postive and ground; I twisted the wires together so they wouldn't flap all over the place. Leave more slack than you think you need on both ends.

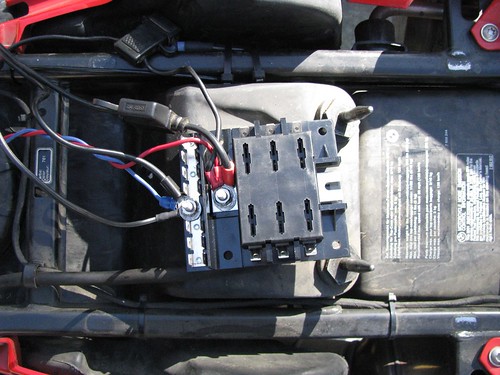
Here's my fuse block all set up. You'll notice that I'm not actually using any of the fuses yet; all of my existing accessories already had inline fuses and I didn't feel like re-splicing everything. So everything so far is hooked directly onto the posts.
Once everything is set up the way you like it; apply the adhesive-backed Velcro to the back of the fuse block and to the bike where you want to mount the block. I forgot to take a photo of it mounted, but it looks just like this, only with wires coming out: